

 SEOGUN
Project 5
1. 배경화면과 오늘의 날씨 만들기
ZStack {
LinearGradient(gradient: Gradient(colors: [Color.blue, Color.white]),
startPoint: .topTrailing, endPoint: .bottomTrailing)
VStack{
Text("서울")
.font(.system(size: 40))
.foregroundColor(.white)
Image(systemName:"sun.max.fill")
.resizable()
.renderingMode(.original)
.frame(width: 180, height: 180)
.aspectRatio(contentMode: .fit)
}
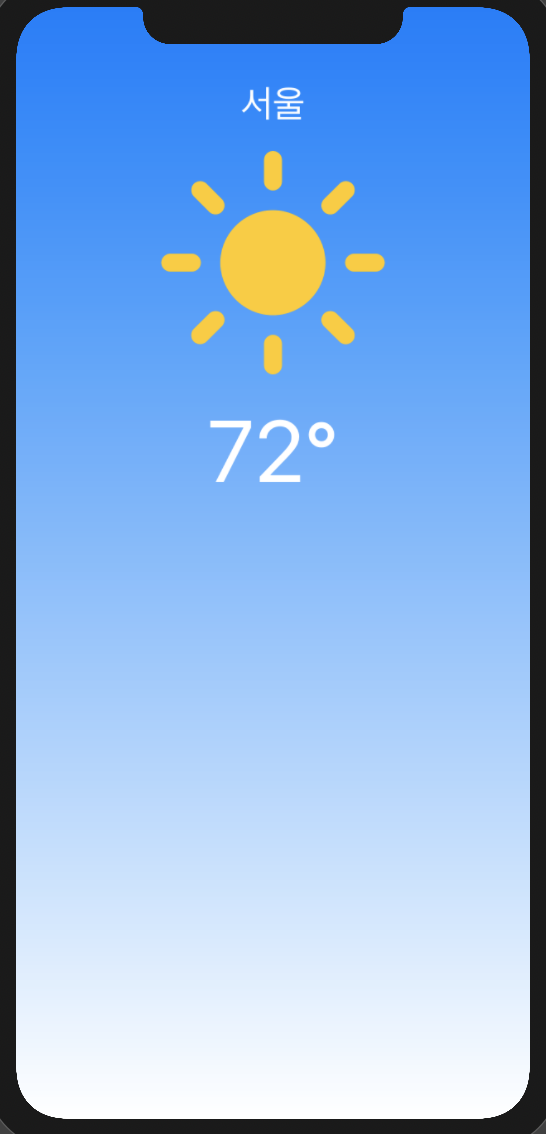
}위 코드와 같이 Gradient로 배경화면을 만들어주고, 도시명과 날씨 아이콘을 SF Symbols를 사용해 가져옵니다. SF Symbols에는 컬러가 기본적으로 적용된 것과 아닌 것이 있는데 심벌을 그냥 가져온다면 검은색 아이콘으로 보입니다.
이것을 컬러 그대로 보이게 하고싶다면 renderingMode(.original) 코드를 반드시 넣어줘야 합니다. 그리고 aspectRatio를 사용하여 비율을 맞춰줍니다.
struct ContentView: View {
    var body: some View {
        ZStack{
            LinearGradient(gradient: Gradient(colors: [Color.blue, Color.white]),
                           startPoint: .topTrailing, endPoint: .bottomTrailing)
                .edgesIgnoringSafeArea(.all)
            VStack(spacing: 20){
                Text("서울")
                    .font(.system(size: 30))
                    .foregroundColor(.white)

                Image(systemName:"sun.max.fill")
                    .resizable()
                    .renderingMode(.original)
                    .frame(width: 180, height: 180)
                    .aspectRatio(contentMode: .fit)

                Text("72°")
                    .font(.system(size: 70))
                    .foregroundColor(.white)

                Spacer()
            }
            .padding()
        }
    }
}
2. 주간 날씨
VStack의 Spacer() 아래에 코드를 추가해주세요.
                HStack{
                    VStack{
                        Text("월")
                            .font(.system(size: 15, weight: .medium))
                            .foregroundColor(.white)
                            .padding()
                        Image(systemName:"sun.max.fill")
                            .resizable()
                            .renderingMode(.original)
                            .frame(width: 50, height: 50)
                            .aspectRatio(contentMode: .fit)

                        Text("72°")
                            .font(.system(size: 20))
                            .foregroundColor(.white)

                    }

                }
이제 5일간의 날씨를 화면 안에 추가해주려고 하는데, 위 코드를 복사해서 붙여 넣기 하면 코드가 너무 길어지겠죠? VStack 부분을 커멘드 클릭하면 아래와 같은 목록이 나오는데 Extract Subview를 눌러줍니다.

struct weatherInfo: View {

    var dayOfWeek : String
    var ImageName : String
    var temperature: Int

    var body: some View {
        VStack{
            Text(dayOfWeek)
                .font(.system(size: 15, weight: .medium))
                .foregroundColor(.white)
                .padding()
            Image(systemName:ImageName)
                .resizable()
                .renderingMode(.original)
                .frame(width: 50, height: 50)
                .aspectRatio(contentMode: .fit)

            Text("\(temperature)°")
                .font(.system(size: 20))
                .foregroundColor(.white)

        }
    }
}
그리고 이처럼 코드를 수정해줍니다. 자 이렇게 하면 아주 간단하게 이름, 이미지, 온도를 쉽게 정해줄 수 있겠죠? 코드를 호출해주겠습니다.
                HStack(spacing: 20){
                    weatherInfo(dayOfWeek: "월", ImageName: "sun.max.fill", temperature: 15)
                    weatherInfo(dayOfWeek: "화", ImageName: "sun.max.fill", temperature: 15)
                    weatherInfo(dayOfWeek: "수", ImageName: "sun.max.fill", temperature: 15)
                    weatherInfo(dayOfWeek: "목", ImageName: "sun.max.fill", temperature: 15)
                    weatherInfo(dayOfWeek: "금", ImageName: "sun.max.fill", temperature: 15)
현재까지 코드
import SwiftUI

struct ContentView: View {
    var body: some View {
        ZStack{
            LinearGradient(gradient: Gradient(colors: [Color.blue, Color.white]),
                           startPoint: .topTrailing, endPoint: .bottomTrailing)
                .edgesIgnoringSafeArea(.all)
            VStack(spacing: 20){
                VStack{
                    Text("서울")
                        .font(.system(size: 30))
                        .foregroundColor(.white)

                    Image(systemName:"sun.max.fill")
                        .resizable()
                        .renderingMode(.original)
                        .frame(width: 180, height: 180)
                        .aspectRatio(contentMode: .fit)

                    Text("72°")
                        .font(.system(size: 70))
                        .foregroundColor(.white)
                }

                Spacer()

                HStack(spacing: 20){
                    weatherInfo(dayOfWeek: "월", ImageName: "sun.max.fill", temperature: 15)
                    weatherInfo(dayOfWeek: "화", ImageName: "sun.max.fill", temperature: 15)
                    weatherInfo(dayOfWeek: "수", ImageName: "sun.max.fill", temperature: 15)
                    weatherInfo(dayOfWeek: "목", ImageName: "sun.max.fill", temperature: 15)
                    weatherInfo(dayOfWeek: "금", ImageName: "sun.max.fill", temperature: 15)

                }

                Spacer()
            }
            .padding()
        }

    }

}


struct ContentView_Previews: PreviewProvider {
    static var previews: some View {
        ContentView()
    }
}

struct weatherInfo: View {

    var dayOfWeek : String
    var ImageName : String
    var temperature: Int

    var body: some View {
        VStack{
            Text(dayOfWeek)
                .font(.system(size: 15, weight: .medium))
                .foregroundColor(.white)
                .padding()
            Image(systemName:ImageName)
                .resizable()
                .renderingMode(.original)
                .frame(width: 50, height: 50)
                .aspectRatio(contentMode: .fit)

            Text("\(temperature)°")
                .font(.system(size: 20))
                .foregroundColor(.white)

        }
    }
}
3. 버튼 만들기
                HStack(spacing: 20){
                    weatherInfo(dayOfWeek: "월", ImageName: "sun.max.fill", temperature: 15)

                   ...

                }
                Spacer()

                Button(action: {

                }) {
                    Text("다크모드로 전환")
                        .font(.system(size: 20))
                        .frame(width: 300, height: 70)
                        .background(Color.white)
                        .cornerRadius(20)
                }
4. 코드 정리
위 버튼에 액션을 넣기 전에 지저분하게 있던 코드들을 정리해주도록 하겠습니다.
배경

LinearGradient쪽에 커멘드 클릭 -> Extract Subview 를 선택 후 아래와 같이 코드를 수정해줍니다.
struct backgroundView: View {
    var topColor: Color
    var bottomColor: Color
    var body: some View {
        LinearGradient(gradient: Gradient(colors: [topColor, bottomColor]),
                       startPoint: .topTrailing, endPoint: .bottomTrailing)
            .edgesIgnoringSafeArea(.all)
    }
}
struct ContentView: View {
    var body: some View {
        ZStack{
            backgroundView(topColor: .blue, bottomColor: .white)
메인 도시
도시명 Text("서울") 쪽도 아래와 같이 따로 만들어주겠습니다.
struct cityName: View {
    var title: String
    var body: some View {

        Text(title)
            .font(.system(size: 30))
            .foregroundColor(.white)
    }
}
ZStack{
backgroundView(topColor: .blue, bottomColor: .white)
VStack(spacing: 20){
VStack{
cityName(title: "서울")메인 날씨 아이콘 및 온도
struct mainweatherIconView: View {

    var ImageName : String
    var temperature: Int

    var body: some View {

        Image(systemName:ImageName)
            .resizable()
            .renderingMode(.original)
            .frame(width: 180, height: 180)
            .aspectRatio(contentMode: .fit)

        Text("\(temperature)°")
            .font(.system(size: 70))
            .foregroundColor(.white)
    }
}
ZStack{
backgroundView(topColor: .blue, bottomColor: .white)
VStack(spacing: 20){
VStack{
cityName(title: "서울")
mainweatherIconView(ImageName: "sun.max.fill", temperature: 15)
}버튼
struct weatherButton: View {
    var title: String
    var backgroundColor: Color
    var textColor: Color

    var body: some View {
        Text(title)
            .font(.system(size: 20))
            .frame(width: 300, height: 70)
            .background(backgroundColor)
            .foregroundColor(textColor)
            .cornerRadius(20)
    }
}
Button(action: {
self.isNight.toggle()
}) {
weatherButton(title: "다크모드로 전환", backgroundColor: .white, textColor: .blue)
}5. 클릭 시 배경 변경
struct ContentView: View {

    @State private var isNight = false

    var body: some View {

    ...

    }
@State 로 isNight라는 값을 false로 정해줍니다. 그리고 background 와 Icon 등을 삼항 연산자를 이용하여 다크 모드일 때의 컬러 또는 아이콘이 될 수 있도록 수정해보겠습니다.
struct ContentView: View {

    @State var isNight = false

    var body: some View {
        ZStack{
            backgroundView(topColor: isNight ? .black : .blue, bottomColor: isNight ? .gray : .white)
            VStack(spacing: 0){
                VStack{
                    cityName(title: "서울")
                    mainweatherIconView(ImageName: isNight ? "moon.stars.fill" : "sun.max.fill", temperature: isNight ? 5 : 15)
                }
이렇게 해서 버튼을 클릭하면 라이트 모드와 다크 모드로 배경/아이콘이 바뀌게 돼있습니다.
6. Binding
@Binding을 사용하여 background 쪽을 재 설정해주도록 하겠습니다.
struct backgroundView: View {

    @Binding var isNight: Bool

    var body: some View {
        LinearGradient(gradient: Gradient(colors: [isNight ? .black : .blue, isNight ? .gray : .white]),
                       startPoint: .topTrailing, endPoint: .bottomTrailing)
            .edgesIgnoringSafeArea(.all)
    }
}
//contentView
var body: some View {
ZStack{
backgroundView(isNight: $isNight)
VStack(spacing: 0){
VStack{
cityName(title: "서울")
mainweatherIconView(ImageName: isNight ? "moon.stars.fill" : "sun.max.fill", temperature: isNight ? 5 : 15)
}7. 다크/라이트버튼 만들기
Button(action: {
    self.isNight.toggle()
}) {
    weatherButtonTitle(title: isNight ? "라이트모드로 전환" : "다크모드로 전환", backgroundColor: isNight ? .gray : .white, textColor: isNight ? .white : .blue)
    }
전체 코드
<hide/>
import SwiftUI

struct ContentView: View {

    @State private var isNight = false

    var body: some View {
        ZStack {

            backgroundView(isNight: $isNight)

            VStack {
                CityTextView(cityName: "서울")

                mainWeatherImageView(weatherImage: isNight ? "moon.fill" : "cloud.drizzle.fill", temperature: 5)
                //이번주 날씨
                HStack(spacing: 20){
                    weatherInfo(dayOfWeek: "월", weatherImage: "cloud.heavyrain.fill", temperature: 5)
                    weatherInfo(dayOfWeek: "화", weatherImage: "cloud.fog.fill", temperature: 7)
                    weatherInfo(dayOfWeek: "수", weatherImage: "cloud.sun.rain.fill", temperature: 10)
                    weatherInfo(dayOfWeek: "목", weatherImage: "sun.max.fill", temperature: 15)
                    weatherInfo(dayOfWeek: "금", weatherImage: "sun.max.fill", temperature: 14)

                }

                Spacer()

                Button(action: {
                    self.isNight.toggle()
                }) {
                    weatherButtonTitle(title: isNight ? "라이트모드로 전환" : "다크모드로 전환", backgroundColor: isNight ? .gray : .white, textColor: isNight ? .white : .blue)
                }


                Spacer()
            }

        }
    }
}


struct ContentView_Previews: PreviewProvider {
    static var previews: some View {
        ContentView()
    }
}

struct weatherInfo: View {

    var dayOfWeek: String
    var weatherImage: String
    var temperature: Int

    var body: some View {
        VStack{
            Text(dayOfWeek)
                .font(.system(size: 15, weight: .medium))
                .foregroundColor(.white)
                .padding()

            VStack(spacing: 20) {
                Image(systemName: weatherImage)
                    .renderingMode(.original)
                    .resizable()
                    .aspectRatio(contentMode: .fit)
                    .frame(width: 50, height: 50)
                Text("\(temperature)°")
                    .font(.system(size: 20))
                    .foregroundColor(.white)
            }
        }
    }
}

struct backgroundView: View {
    @Binding var isNight: Bool

    var body: some View {
        LinearGradient(gradient: Gradient(colors: [isNight ? .black : .blue, isNight ? .gray : Color("lightblue")]), startPoint: .topTrailing, endPoint: .bottomTrailing).edgesIgnoringSafeArea(.all)
            .animation(.easeIn)
    }
}

struct CityTextView: View {

    var cityName: String
    var body: some View {
        Text(cityName)
            .font(.system(size: 30, weight: .medium))
            .foregroundColor(.white)
            .padding()
    }
}

struct mainWeatherImageView: View {

    var weatherImage: String
    var temperature: Int

    var body: some View {
        VStack(spacing: 20) {
            Image(systemName: weatherImage)
                .renderingMode(.original)
                .resizable()
                .aspectRatio(contentMode: .fit)
                .frame(width: 180, height: 180)
            Text("\(temperature)°")
                .font(.system(size: 70))
                .foregroundColor(.white)
        }
        .padding(.bottom, 40)
    }
}

struct weatherButtonTitle: View {
    var title: String
    var backgroundColor: Color
    var textColor: Color

    var body: some View {
        Text(title)
            .frame(width: 300, height: 60)
            .background(backgroundColor)
            .cornerRadius(20)
            .font(.system(size: 23, weight: .bold))
            .foregroundColor(textColor)
    }
}
읽어주셔서 감사합니다🤟
본 게시글의 전체 코드 GitHub 👇🏻
Seogun95/SwiftUI_Weather_TUT
간단하게 Weather을 만들어 SwiftUI 알아보기. Contribute to Seogun95/SwiftUI_Weather_TUT development by creating an account on GitHub.
github.com
'PROJECT > Simple' 카테고리의 다른 글
| SwiftUI Project7 : Stack / ScrollView / Link (0) | 2021.03.11 |
|---|---|
| SwiftUI Project6 : Use Views From Other Frameworks (0) | 2021.03.08 |
| SwiftUI Project4 : Lottie 애니메이션으로 카드만들기 (0) | 2021.02.10 |
| SwiftUI Project3 : List view를 사용하여 Grid 만들기 (0) | 2021.02.09 |
| SwiftUI Project2 : Slider (2) | 2021.02.05 |


 한국어 (기본)
 English
 Русский
 日本語
日本語
