

 SEOGUN
Project2 : Slider
Flag 배열 생성
Slider를 사용하여 프로젝트를 만들어보겠습니다.
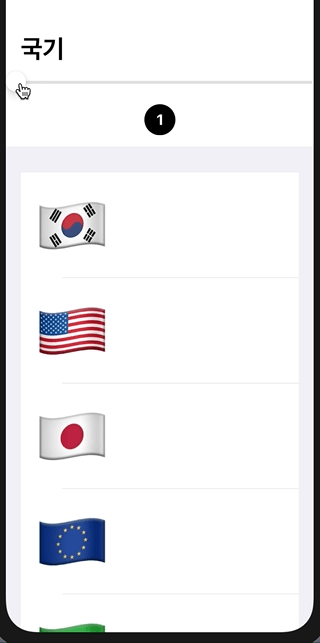
첫 번째로, ContentView에 NavigationView를 생성해서 NavigationBarTitle을 "국기"로 정해주겠습니다,
struct ContentView: View {
    let flag = ["🇰🇷", "🇺🇸", "🇯🇵", "🇪🇺", "🇸🇱", "🇧🇪", "🇲🇨", "🇬🇳", "🇿🇦", "🇳🇮", "🇨🇦", "🇹🇷", "🇨🇮", "🇮🇹", "🇬🇧", "🇨🇭", "🇸🇴"]

    var body: some View {
        NavigationView {
            VStack {

            }
            .navigationBarTitle("국기")
        }
    }
}
그리고 flag의 배열에 한 번 더 배열로 감싸주겠습니다. 짝을 지어주는거죠
    let flag = [["🇰🇷", "🇺🇸"],["🇯🇵", "🇪🇺"],["🇸🇱", "🇧🇪"],["🇲🇨", "🇬🇳",],
                ["🇿🇦", "🇳🇮"],["🇨🇦", "🇹🇷", "🇨🇮"],["🇮🇹", "🇬🇧"],["🇨🇭", "🇸🇴"]]
var body: some View {
NavigationView {
VStack {
List(self.flag, id: \.self) { flagPair in
ForEach(flagPair, id: \.self) { flags in
Text(flags)
//국기의 크기를 설정
.font(.system(size: 100))
}
}
}
.navigationBarTitle("국기")
}
}
Extenstion 생성
Xcode에 새로운 폴더를 만들고, 이름을 Extension이라고 정합니다. 새로운 폴더를 생성 후 이름은 'Array+Extension'이라고 설정해줬습니다. 코드를 다음과 같이 작성해줍니다.
//Array+Extension.swift

import Foundation

//배열을 설정하는 익스텐션
extension Array {
    //chunks라는 변수를 만든다.
    func chunks(size: Int) -> [ArraySlice<Element>] {

        var chunks: [ArraySlice<Element>] = [ArraySlice<Element>]()
        // stride는 한 항목에서 다른 항목으로, 현위치에서 다른위치로 이동할 수 있게 한다.
        for index in stride(from: 0, through: self.count - 1, by: size) {

            var chunk = ArraySlice<Element>()
            let end = index + size
            if end >= self.count {
                chunk = self[index..<self.count]
            } else {
                chunk = self[index..<end]
            }
            chunks.append(chunk)

            if (end + 1) == self.count {
                let remainingChunk = self[end..<self.count]
                chunks.append(remainingChunk)
            }
        }
        //반환값
        return chunks
    }
}
Slider 될 때마다 이미지 추가
자, Extension을 만들어줬으면 이제 이것을 ContentView에 적용시켜보도록 하겠습니다.
struct ContentView: View {
    let flag = [...]

    @State private var sliderValue: CGFloat = 1
그리고 슬라이드 할 때 마다 숫자가 바뀌는 코드를 생성해줘야 합니다.
VStack 안에 다음과 같은 코드를 작성해주겠습니다.
VStack {
                                              //3페이지 까지만 보여줌
                Slider(value: $sliderValue, in: 1...3, step: 1)
                //슬라이드 할 때 마다 숫자가 변함
                Text(String(format: "%.0f", self.sliderValue))
                    .font(.system(size: 20))
                    .fontWeight(.bold)
                    .padding()
                    .background(Color.black)
                    .foregroundColor(Color.white)
                    .clipShape(Circle())
슬라이더를 움직일 때마다 숫자가 바뀌지만, 아래 이미지는 바뀌지 않는 것을 확인할 수 있습니다.
우리는 Extentsion을 따로 만들어줬으니, 이것을 ContentView에 적용시켜야 합니다.
먼저, flag를 재 배열해줍니다.
let flag = ["🇰🇷", "🇺🇸", "🇯🇵", "🇪🇺", "🇸🇱", "🇧🇪", "🇲🇨", "🇬🇳","🇿🇦", "🇳🇮", "🇨🇦", "🇹🇷", "🇨🇮", "🇮🇹", "🇬🇧","🇨🇭", "🇸🇴"]그리고 List 부분을 다음과 같이 수정해줍니다.
                List(self.flag.chunks(size: self.sliderValue), id: \.self) { flagPair in
                    ForEach(flagPair, id: \.self) { flags in
                        Text(flags)
                            //국기의 크기를 설정
                            .font(.system(size: 100))
                    }
                }
List(self.flag.chunks(size: self.sliderValue)를 넣어주면 오류가 생깁니다.

sliderValue는 CGFloat값 이기 때문에 Int가 와야 하기 때문이죠. Fix를 눌러주면 다음과 같은 코드가 됩니다.
 List(self.flag.chunks(size: Int(self.sliderValue)), id: \.self) { flagPair in
                    ForEach(flagPair, id: \.self) { flags in
                        Text(flags)
                            //국기의 크기를 설정
                            .font(.system(size: 100))
                    }
                }
flagPair 부분도 chunk라고 수정해줍니다.
 List(self.flag.chunks(size: Int(self.sliderValue)), id: \.self) { chunk in
                    ForEach(chunk, id: \.self) { flags in
                        Text(flags)
                            //국기의 크기를 설정
                            .font(.system(size: 100))
                    }
                }
화면을 이미지가 꽉 채워질 수 있도록 사이즈를 조절해주도록 하겠습니다.
         List(self.flag.chunks(size: Int(self.sliderValue)), id: \.self) { chunk in
             ForEach(chunk, id: \.self) { flags in
                 Text(flags)
                     //국기의 크기를 설정
                             //숫자를 변경해보면 화면에 딱맞는건 300이라는걸 알 수 있다.
                     .font(.system(size: CGFloat(300/self.sliderValue)))
             }
         }
전체 코드
contentView
import SwiftUI

struct ContentView: View {
    let flag = ["🇰🇷", "🇺🇸", "🇯🇵", "🇪🇺", "🇸🇱", "🇧🇪", "🇲🇨", "🇬🇳","🇿🇦", "🇳🇮", "🇨🇦", "🇹🇷", "🇨🇮", "🇮🇹", "🇬🇧","🇨🇭", "🇸🇴"]

    @State private var sliderValue: CGFloat = 1

    var body: some View {
        NavigationView {


            VStack {

                Slider(value: $sliderValue, in: 1...7, step: 1)
                //슬라이드 할 때 마다 숫자가 변함
                Text(String(format: "%.0f", self.sliderValue))
                    .font(.system(size: 20))
                    .fontWeight(.bold)
                    .padding()
                    .background(Color.black)
                    .foregroundColor(Color.white)
                    .clipShape(Circle())

                List(self.flag.chunks(size: Int(self.sliderValue)), id: \.self) { chunk in
                    ForEach(chunk, id: \.self) { flags in
                        Text(flags)
                            //국기의 크기를 설정
                                    //숫자를 변경해보면 화면에 딱맞는건 300이라는걸 알 수 있다.
                            .font(.system(size: CGFloat(300/self.sliderValue)))
                    }
                }
            }
            .navigationBarTitle("국기")
        }
    }
}

struct ContentView_Previews: PreviewProvider {
    static var previews: some View {
        ContentView()
    }
}
extension
import Foundation

//배열을 설정하는 익스텐션
extension Array {
    //chunks라는 변수를 만든다.
    func chunks(size: Int) -> [ArraySlice<Element>] {

        var chunks: [ArraySlice<Element>] = [ArraySlice<Element>]()
        // stride는 한 항목에서 다른 항목으로, 현위치에서 다른위치로 이동할 수 있게 한다.
        for index in stride(from: 0, through: self.count - 1, by: size) {

            var chunk = ArraySlice<Element>()
            let end = index + size
            if end >= self.count {
                chunk = self[index..<self.count]
            } else {
                chunk = self[index..<end]
            }
            chunks.append(chunk)

            if (end + 1) == self.count {
                let remainingChunk = self[end..<self.count]
                chunks.append(remainingChunk)
            }
        }
        //반환값
        return chunks
    }
}
읽어주셔서 감사합니다🤟
본 게시글의 전체코드 GitHub 👇🏻
Seogun95/SwiftUI_Project2-Slider-
SwiftUI에서 Grid를 사용하여 간단한 프로젝트를 만들어 봅시다. Contribute to Seogun95/SwiftUI_Project2-Slider- development by creating an account on GitHub.
github.com
[SwiftUI 기초/View layout] - SwiftUI : Slider
[SwiftUI 기초/View layout] - SwiftUI : ForEach
[SwiftUI 기초/View layout] - SwiftUI : List (ListStyle / onDelete / onMove)
'PROJECT > Simple' 카테고리의 다른 글
| SwiftUI Project6 : Use Views From Other Frameworks (0) | 2021.03.08 |
|---|---|
| SwiftUI Project5 : 날씨앱 'SwiftUI 기초 배우기' (0) | 2021.03.06 |
| SwiftUI Project4 : Lottie 애니메이션으로 카드만들기 (0) | 2021.02.10 |
| SwiftUI Project3 : List view를 사용하여 Grid 만들기 (0) | 2021.02.09 |
| SwiftUI Project1 : Extension으로 정보가져오기 (0) | 2021.02.02 |


 한국어 (기본)
 English
 Русский
 日本語
日本語
