Sheet & FullScreenCover & Transition & Animation
이번에는 Sheet & FullScreenCover & Transition & Animation를 비교해보도록 하겠습니다.
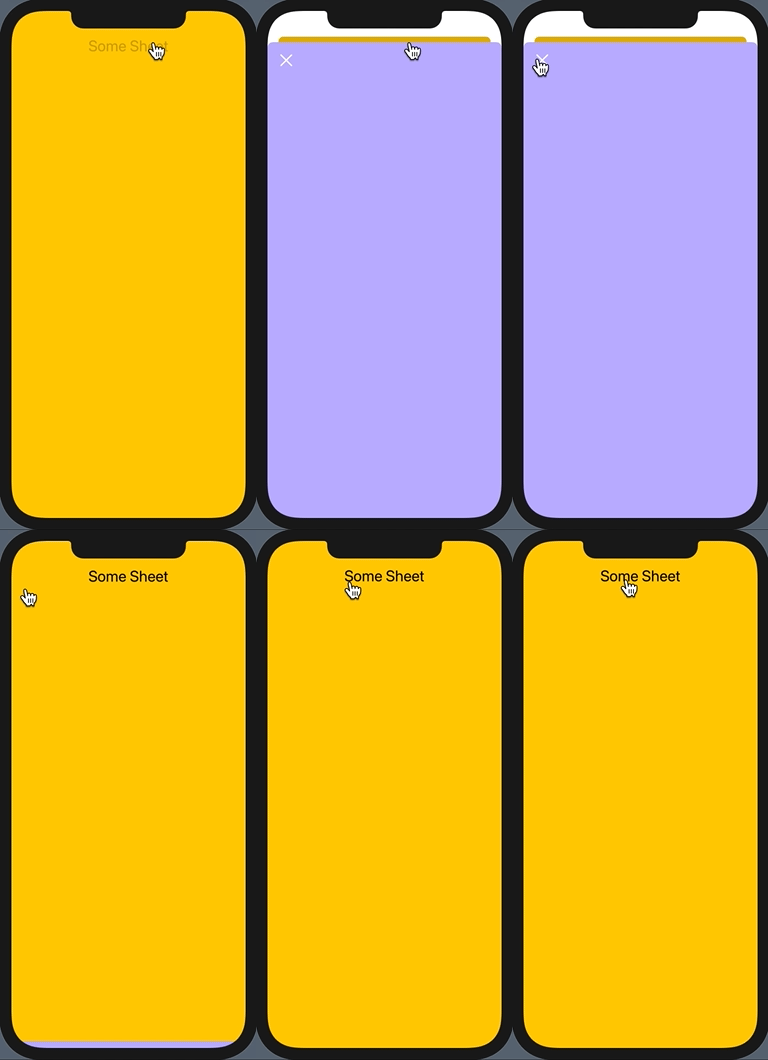
위 수정자를 사용해서 모두 동일하게 sheet의 효과를 줄 수 있습니다. 간단하게 sheet부터 시작하도록 하겠습니다.
Sheet
sheet수정자는 sheetView에 presentationMode를 적용시켜 sheet뷰에서 "X" 버튼을 누르면 닫힐 수 있도록 만들어 줬습니다.
import SwiftUI

// MARK : Body
struct ContentView: View {
    @State var showView: Bool = false
    var body: some View {
        ZStack(alignment: .top) {
            Color.yellow
                .ignoresSafeArea()

            VStack {
                Button(action: {
                    showView.toggle()
                }) {
                    Text("Some Sheet")
                        .font(.title)
                        .foregroundColor(.black)
                }
            }
            // METHOD 1 - SHEET
            .sheet(isPresented: $showView, content: {
                sheetView()
            })
        }
    }
}

// SheetView
struct sheetView: View {
    @Environment(\.presentationMode) var presentationMode
    var body: some View {
        ZStack(alignment: .topLeading) {
            Color("Paleblue")
                .ignoresSafeArea()

            Button(action: {
                presentationMode.wrappedValue.dismiss()
            }) {
                Image(systemName: "xmark")
                    .font(.title)
                    .foregroundColor(.white)
                    .padding(20)
            }
        }
    }
}

// MARK : PrieView
struct ContentView_Previews: PreviewProvider {

    static var previews: some View {
        ContentView()
    }
}

FullScreenCover
fullscreenCover은 Sheet와 코드가 동일하지만 METHOD부분 코드를 fullScreenCover로 수정해주겠습니다.
            // METHOD 2 - FullScreenCover
            .fullScreenCover(isPresented: $showView, content: {
               sheetView()
}) 
Transition
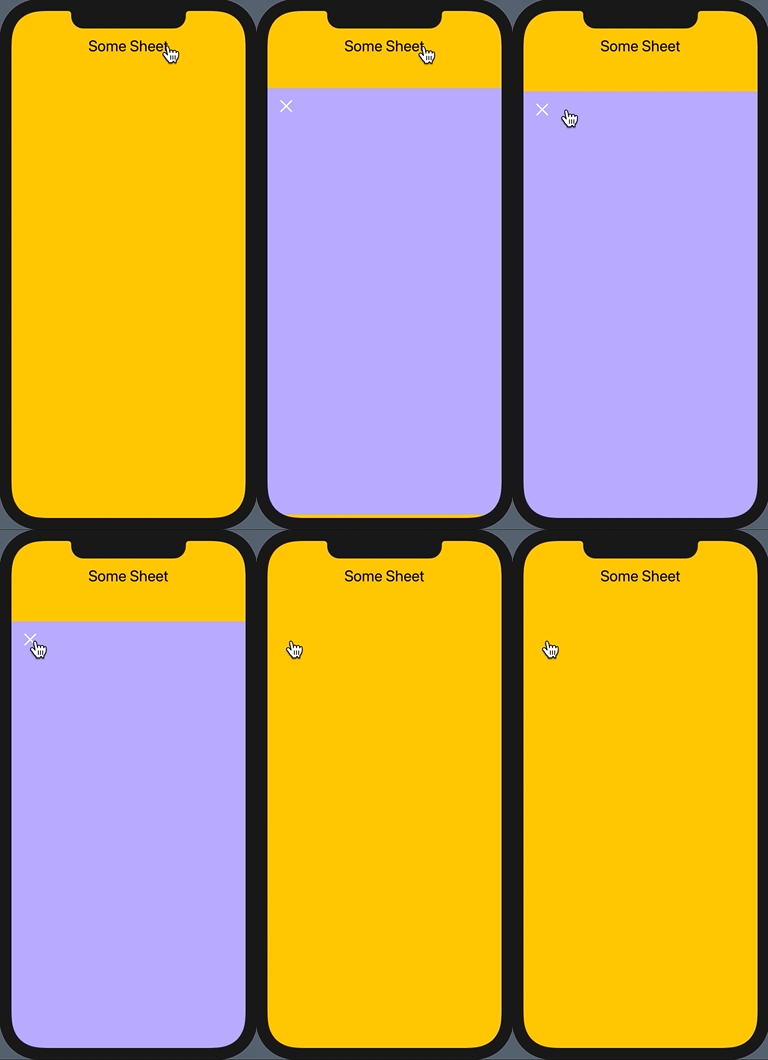
transition을 사용해서 sheet효과와 비슷하게 구현할 수 있지만 조금 복잡할 수 있습니다. 저번 게시물에서 다뤘듯이 transition을 사용하려면 조건이 반드시 있어야 합니다.
우선 if문으로 showView가 true이면 sheetView를 실행할 수 있도록 해 주고 top패딩을 100으로 설정해 sheet처럼 보이도록 설정해줍니다. 그리고 sheetView가 bottom에서 등장할 수 있게 해 줬습니다.
또 sheet에서 사용했던 presentationMode를 삭제하고 @Binding으로 showView를 불러와 Button에 showView.toggle()을 추가해줬습니다.
import SwiftUI

// MARK : Body
struct ContentView: View {
    @State var showView: Bool = false
    var body: some View {
        ZStack(alignment: .top) {
            Color.yellow
                .ignoresSafeArea()

            VStack {
                Button(action: {
                    showView.toggle()
                }) {
                    Text("Some Sheet")
                        .font(.title)
                        .foregroundColor(.black)
                }
            }
            // METHOD 3 - TRANSITION
            if showView {
                sheetView(showView: $showView)
                    .padding(.top, 100)
                    .transition(AnyTransition.move(edge: .bottom))
                    .animation(.spring())
            }
        }
    }
}

// SheetView
struct sheetView: View {
    @Binding var showView: Bool
    var body: some View {
        ZStack(alignment: .topLeading) {
            Color("Paleblue")
                .ignoresSafeArea()

            Button(action: {
                showView.toggle()
            }) {
                Image(systemName: "xmark")
                    .font(.title)
                    .foregroundColor(.white)
                    .padding(20)
            }
        }
    }
}

// MARK : PrieView
struct ContentView_Previews: PreviewProvider {

    static var previews: some View {
        ContentView()
    }
}
아래 결과 화면을 보면 sheetView가 나타날 때는 이상 없이 애니메이션 효과가 적용된 것을 볼 수 있지만 "X" 를 눌러서 닫을 때에는 애니메이션 효과가 제대로 적용되지 않았습니다.

이것은 ZStack과 .zIndex를 사용하면 해결할 수 있습니다. if문을 ZStack으로 덮어주고 ZStack외부에 .zIndex(2.0)을 추가해줍니다. 그러면 VStack보다 ZStack이 최상위로 오게 되는 것이죠.
            // METHOD 3 - TRANSITION
            ZStack {
                if showView {
                    sheetView(showView: $showView)
                        .padding(.top, 100)
                        .transition(AnyTransition.move(edge: .bottom))
                        .animation(.spring())
                }
            }
            .zIndex(2.0)
Animation
마찬가지로 Animation은 삼항연산자를 사용해서 구현할 수 있습니다.
            // METHOD 4 - Animation
            sheetView(showView: $showView)
                .padding(.top, 100)
                .offset(y: showView ? 0 : UIScreen.main.bounds.height)
                .animation(.spring())
읽어주셔서 감사합니다🤟
SwiftUI : 애니메이션과 비슷한 Transitions
SwiftUI : Sheet / FullScreenCover (@Environment / presentationMode)
'SWIFTUI > Others' 카테고리의 다른 글
| SwiftUI : Markups과 Documentation을 추가하는 방법 (0) | 2021.05.13 |
|---|---|
| SwiftUI : ActionSheet (0) | 2021.05.12 |
| SwiftUI : 애니메이션과 비슷한 Transitions (0) | 2021.05.10 |
| SwiftUI : Animation #3 (0) | 2021.05.10 |
| SwiftUI : Identifiable을 사용하여 연락처 뷰 (0) | 2021.05.03 |


 한국어 (기본)
 English
 Русский
 日本語
日本語
