ActionSheet에 대해 알아보도록 합시다.
ActionSheet
@State var someBindig = fasle

.actionSheet(isPresented: $someBinding) {
  ActionSheet(title: Text, message: Text, button: [ActionSheet.Button])

}SwiftUI는 사용자가 선택할 수있는action Sheet를 만들기위한 ActionSheet View를 제공하며 Alert와 유사하게 작동합니다.
Alert와 마찬가지로 action Sheet를 표시할지 여부를 추적하는 속성을 정의해야 합니다. 그런 다음 actionSheet() 수정자를 사용하여 해당 속성을 모니터링하고 조건이 true가 되면 선택한 action Sheet를 표시합니다.
주의 : ActionSheet는 macOS에서 사용할 수 없습니다.
struct ContentView: View {

    @State private var showingSheet = false

    var body: some View {

    }
}ShowingSheet를 false로 속성값을준 뒤, 아래와 같이 ActionSheet를 작성 할 수 있습니다.
buttons: [.default(Text(""))]
    var body: some View {
        Button("서근개발블로그") {
            self.showingSheet.toggle()
        }
        .actionSheet(isPresented: $showingSheet) {
            ActionSheet(title: Text("Some Title"),
                        message: Text("Some message"),
                        buttons: [.default(Text("Dismiss Action Sheet"))])
        }
    }
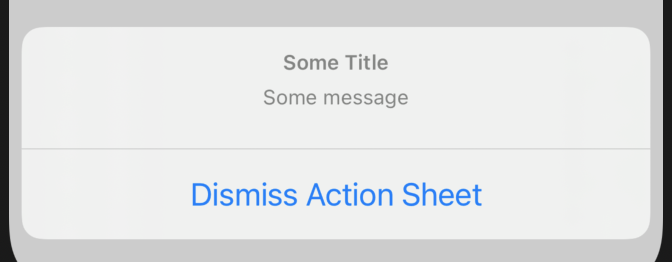
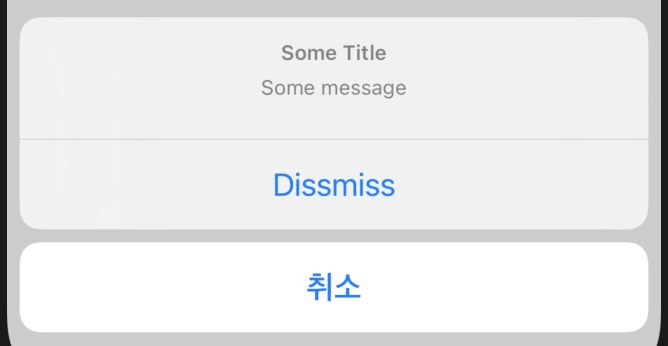
Dismiss 버튼 아래에 취소 버튼을 만들어줄 수 있습니다.
buttons: [.default(Text("")), .cancel(Text(""))]
   var body: some View {
        Button("서근개발블로그") {
            self.showingSheet.toggle()
        }
        .actionSheet(isPresented: $showingSheet) {
            ActionSheet(title: Text("Some Title"),
                        message: Text("Some message"),
                        buttons: [.default(Text("Dissmiss")),
                                  .cancel(Text("취소"))
                        ])
        }
   }
함수 사용
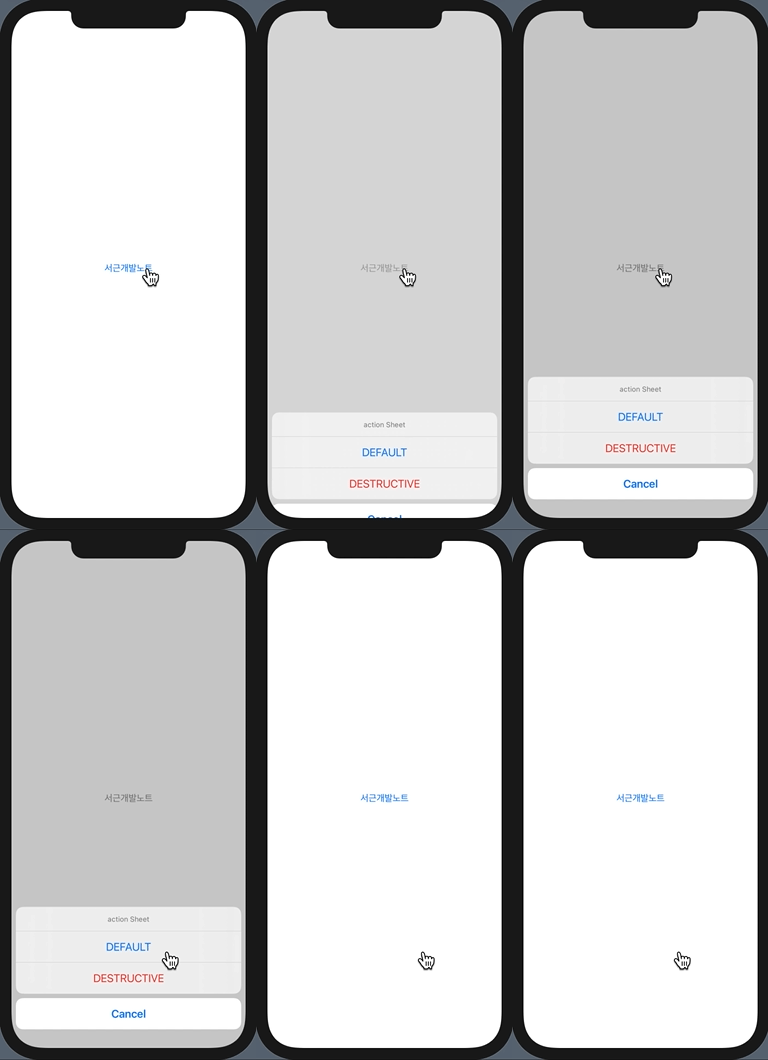
body에 actionSheet를 직접 사용할 수도 있지만 func를 사용하여 코드를 더 깔끔하게 정리할 수 있습니다.
import SwiftUI

struct actionSheet: View {
    @State var showActionSheet: Bool = false
    var body: some View {

        Button(action: {
            showActionSheet.toggle()
        }) {
            Text("서근개발노트")
        }
        .actionSheet(isPresented: $showActionSheet, content: getActionSheet)
    }

    // actionSheet 함수
    func getActionSheet() -> ActionSheet {

        let button1: ActionSheet.Button = .default(Text("default".uppercased()))
        let button2: ActionSheet.Button = .destructive(Text("destructive".uppercased()))
        let button3: ActionSheet.Button = .cancel()

        let title = Text("action Sheet")

        return ActionSheet(title: title,
                           message: nil,
                           buttons: [button1, button2, button3])
    }
}
ActionSheetOption
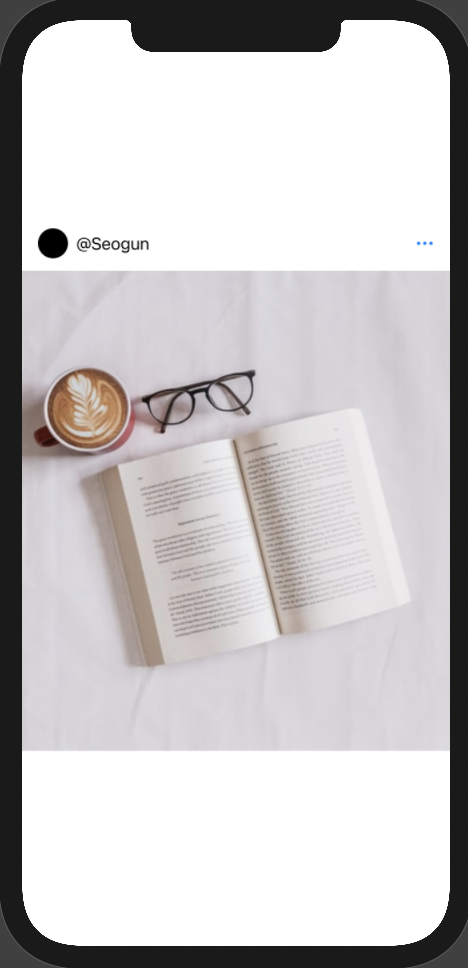
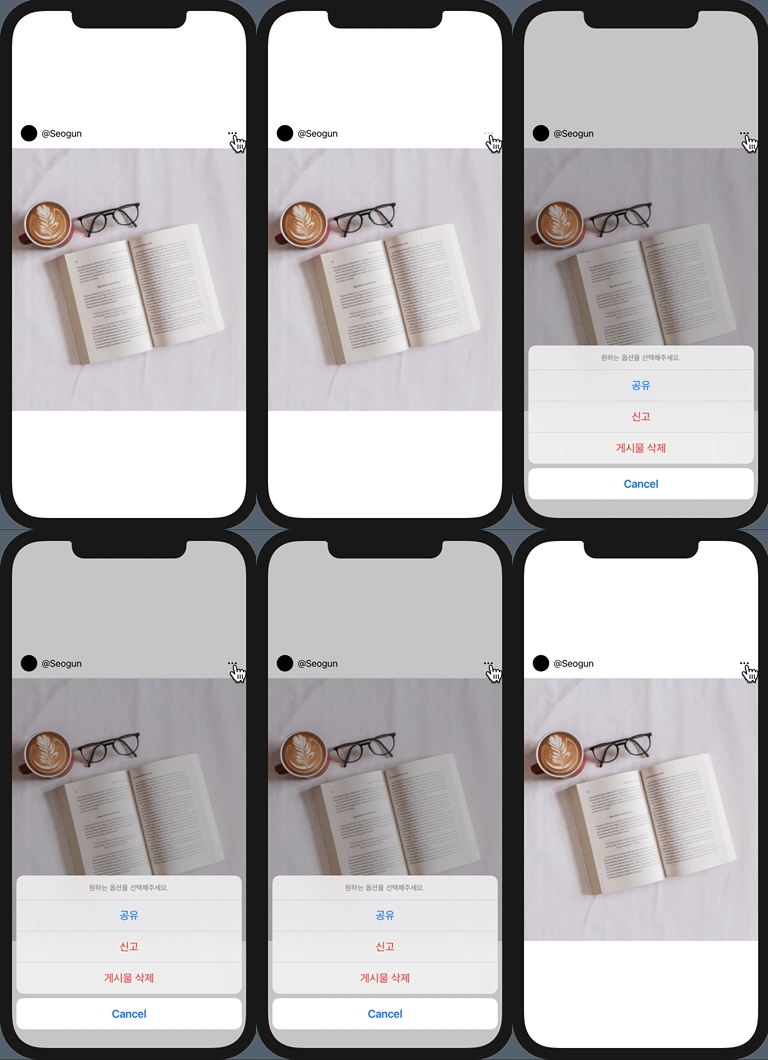
이제 actionSheet를 활용해볼게요. 만약 Instrgrame 같은 어플에서 오른쪽에 더보기 버튼을 누르면 공유, 삭제, 신고 버튼을 나타나게 하고 또 다른 옵션으로는 내 게시물일 때와 다른 사람의 게시물일 때를 다르게 나오게 해 줄 수 있습니다.
우선 인스타그램 같은 게시글 뷰를 만들어줄게요.
import SwiftUI

struct actionSheet: View {
    @State var showActionSheet: Bool = false

    var body: some View {

        VStack {
            HStack {
                Circle()
                    .frame(width: 30, height: 30)
                Text("@Seogun")
                Spacer()

                Button(action: {
                    showActionSheet.toggle()
                }) {
                    Image(systemName: "ellipsis")
                }
                .actionSheet(isPresented: $showActionSheet, content: {
                    ActionSheet(title: Text("서근"))
                })

            }
            .padding(.horizontal)

            Image("book")
                .aspectRatio(1.0, contentMode: .fit)
        }
    }
}
이제 ActionSheetOptions라는 enum을 만들어서 @State로 정해주겠습니다.
struct actionSheet: View {
    @State var showActionSheet: Bool = false
    @State var actionSheetOption: ActionSheetOption = .isOtherPost

    enum ActionSheetOption {
        case isMyPost
        case isOtherPost
    }

    var body: some View {
    }
}
그리고 함수를 하나 만들어줄게요.
    func getActionSheet() -> ActionSheet {

        let title = Text("원하는 옵션을 선택해주세요.")
        let shareButton: ActionSheet.Button = .default(Text("공유"))
        let reportButton: ActionSheet.Button = .destructive(Text("신고"))
        let deleteButton: ActionSheet.Button = .destructive(Text("게시물 삭제"))
        let cancleButton: ActionSheet.Button = .cancel()


        return ActionSheet(title: title,
                           message: nil,
                           buttons: [])
    }
그리고 swich문을 사용하여 내 게시물 일 때와 다른 사람의 게시물 일 때의 조건을 다르게 해 주겠습니다.
    func getActionSheet() -> ActionSheet {

        let title = Text("원하는 옵션을 선택해주세요.")
        let shareButton: ActionSheet.Button = .default(Text("공유"))
        let reportButton: ActionSheet.Button = .destructive(Text("신고"))
        let deleteButton: ActionSheet.Button = .destructive(Text("게시물 삭제"))
        let cancleButton: ActionSheet.Button = .cancel()

        switch actionSheetOption {
        case .isMyPost:
            return ActionSheet(title: title,
                               message: nil,
                               buttons: [shareButton, reportButton, deleteButton, cancleButton])

        case .isOtherPost:
            return ActionSheet(title: title,
                               message: nil,
                               buttons: [shareButton, reportButton, cancleButton])
        }
    }
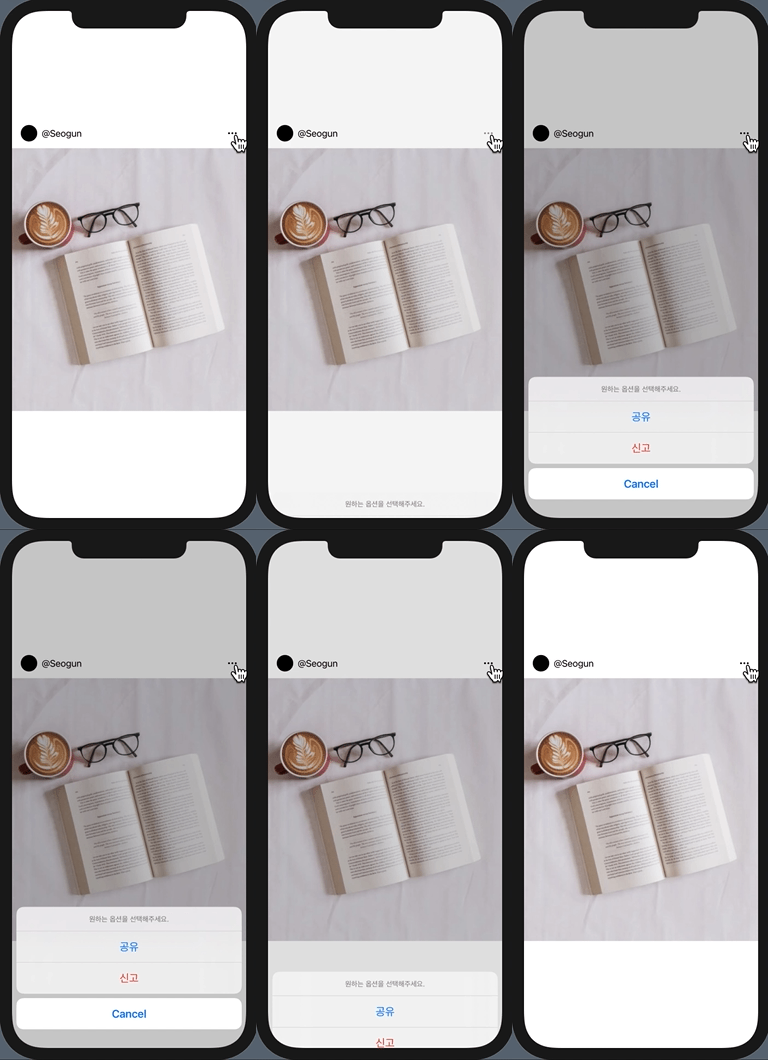
자 이렇게 함수를 만들어 줬고 다음으로는 body의 button action부분에 actionSheetOption =. isMyPost 또는 .isOtherPost를 정해주고 actionSheet수정자에 getActionSheet를 넣어주겠습니다.
import SwiftUI

//body
struct actionSheet: View {
    @State var showActionSheet: Bool = false
    @State var actionSheetOption: ActionSheetOption = .isOtherPost

    enum ActionSheetOption {
        case isMyPost
        case isOtherPost
    }

    var body: some View {

        VStack {
            HStack {
                Circle()
                    .frame(width: 30, height: 30)
                Text("@Seogun")
                Spacer()

                Button(action: {
                    actionSheetOption = .isMyPost
                    showActionSheet.toggle()
                }) {
                    Image(systemName: "ellipsis")
                }
                .actionSheet(isPresented: $showActionSheet, content: getActionSheet)

            }
            .padding(.horizontal)

            Image("book")
                .aspectRatio(1.0, contentMode: .fit)
        }
    }

    //함수구현부
    func getActionSheet() -> ActionSheet {

        let title = Text("원하는 옵션을 선택해주세요.")
        let shareButton: ActionSheet.Button = .default(Text("공유"))
        let reportButton: ActionSheet.Button = .destructive(Text("신고"))
        let deleteButton: ActionSheet.Button = .destructive(Text("게시물 삭제"))
        let cancleButton: ActionSheet.Button = .cancel()

        switch actionSheetOption {
        case .isMyPost:
            return ActionSheet(title: title,
                               message: nil,
                               buttons: [shareButton, reportButton, deleteButton, cancleButton])

        case .isOtherPost:
            return ActionSheet(title: title,
                               message: nil,
                               buttons: [shareButton, reportButton, cancleButton])
        }
    }
}
읽어주셔서 감사합니다🤟
'SWIFTUI > Others' 카테고리의 다른 글
| SwiftUI : Gesture (0) | 2021.05.29 |
|---|---|
| SwiftUI : Markups과 Documentation을 추가하는 방법 (0) | 2021.05.13 |
| SwiftUI : Sheet & FullScreenCover & Transition & Animation 비교 (0) | 2021.05.11 |
| SwiftUI : 애니메이션과 비슷한 Transitions (0) | 2021.05.10 |
| SwiftUI : Animation #3 (0) | 2021.05.10 |


 한국어 (기본)
 English
 Русский
 日本語
日本語
