

 SEOGUN
Animation #3
이번에는 Animation을 실제로 비교해가면서 사용해보도록 하겠습니다.
우선 Animation은 앞서 배웠기 때문에 바로 코드로 비교해보도록 할게요 :)
Animation.default
각 RoundedRectangle에 삼항연산자를 사용해서 값을 넣어줬고 overlay를 사용하여 어느 효과를 부여받고 있는지 보기 좋게 텍스를 적어줬습니다. 이제 아래 결과 화면을 보며 효과를 비교해 볼 수 있겠죠?
import SwiftUI

struct ContentView: View {
    @State var animate: Bool = false
    let timing: Double = 10.0
    var body: some View {
        VStack {
            Button("애니메이션") {
                animate.toggle()
            }
            RoundedRectangle(cornerRadius: 20)
                .frame(width: animate ? 300 : 200, height: 100)
                .overlay(
                    Text("animation : default")
                        .foregroundColor(Color.white)
                )
                .animation(Animation.default)

            RoundedRectangle(cornerRadius: 20)
                .frame(width: animate ? 300 : 200, height: 100)
                .overlay(
                    Text("animation : easeOut")
                        .foregroundColor(Color.white)
                )
                .animation(Animation.easeOut(duration: timing))

            RoundedRectangle(cornerRadius: 20)
                .frame(width: animate ? 300 : 200, height: 100)
                .overlay(
                    Text("animation : easeIn")
                        .foregroundColor(Color.white)
                )
                .animation(Animation.easeIn(duration: timing))

            RoundedRectangle(cornerRadius: 20)
                .frame(width: animate ? 300 : 200, height: 100)
                .overlay(
                    Text("animation : linear")
                        .foregroundColor(Color.white)
                )
                .animation(Animation.linear(duration: timing))
        }
    }
}

default는 지연(duration) 효과를 주지 않았기 때문에 제일 빠르네요.
순서는 default > EaseOut > linear > EaseIn 순으로 빠른것을 확인할 수 있습니다.
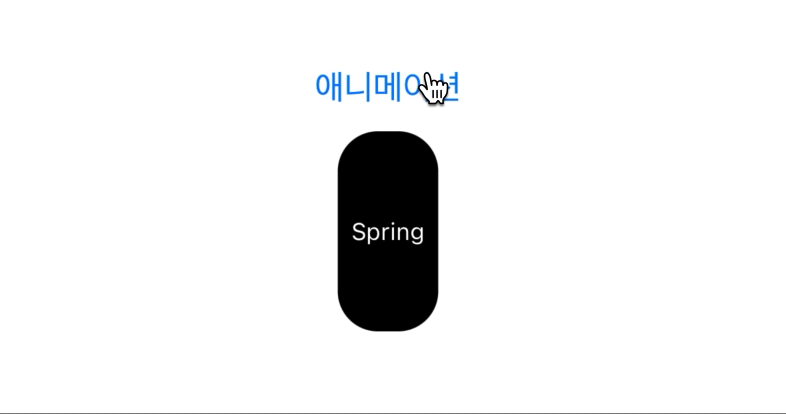
Animation.Spring / animation(.none)
그다음으로는 제가 가장 좋아하는 Spirng효과를 한번 보도록 할게요.
Spring은 default와 비슷해 보이지만 조금 더 자연스럽습니다. 그리고 duration효과가 필요하지 않죠. 마찬가지로 default와 비교해보겠습니다.
struct ContentView: View {
    @State var animate: Bool = false
    var body: some View {
        VStack {
            Button("애니메이션") {
                animate.toggle()
            }

            RoundedRectangle(cornerRadius: 20)
                .frame(width: animate ? 300 : 50, height: 100)
                .overlay(
                    Text("Spring")
                        .font(animate ? .headline : .caption)
                        .foregroundColor(Color.white)
                        //텍스트 애니메이션 미적용
                        .animation(.none)

                )
                .animation(Animation.spring())

            RoundedRectangle(cornerRadius: 20)
                .frame(width: animate ? 300 : 50, height: 100)
                .overlay(
                    Text("default")
                        .font(animate ? .headline : .caption)
                        .foregroundColor(Color.white)
                )
                .animation(Animation.default)
        }
    }
}
여기서 저는 Text의 크기도 삼항 연산자로 넣어줬는데 Text까지 애니메이션이 적용되어 보기 좋지 않았습니다. 이럴 때 부분적으로 애니메이션을 적용시키지 않게 해 줄 수 있는 데 사용법은 간단합니다. 바로 animation(.none)만 원하는 위치에 넣어주면 되죠 :)
아래에서 봐야 할 것은 Spring과 default의 차이와 Text의 animation적용된 것과 미적용된 것을 주의 깊게 봐주시길 바랍니다.

Spring에도 여러 가지 기능을 추가할 수 있습니다.

RoundedRectangle(cornerRadius: 20)
    .frame(width: animate ? 300 : 50, height: 100)
    .overlay(
        Text("Spring")
            .font(animate ? .headline : .caption)
            .foregroundColor(Color.white)
            //텍스트 애니메이션 미적용
            .animation(.none)

    )
    .animation(Animation.spring(
                // 몇초에 걸쳐서 작동시킬지
                response: 3.0,
                // damping 비율 할지
                dampingFraction: 0.3,
                // 블랜드시간 기본 1로 지정
                blendDuration: 1.0)
    )
RoundedRectangle(cornerRadius: 20)
    .frame(width: animate ? 300 : 50, height: 100)
    .overlay(
        Text("Spring")
            .font(animate ? .headline : .caption)
            .foregroundColor(Color.white)
            //텍스트 애니메이션 미적용
            .animation(.none)

    )
    .animation(Animation.spring(
                // 몇초에 걸쳐서 작동시킬지
                response: 0.5,
                // 얼마나 덤핑 할지
                dampingFraction: 0.7,
                // 블랜드시간 기본 1로 지정
                blendDuration: 1.0)
    )

한번 직접 애니메이션을 구현해보시는 걸 추천드립니다. 정말 재미있는 기능인 거 같아요 ㅎㅎ
읽어주셔서 감사합니다🤟
'SWIFTUI > Others' 카테고리의 다른 글
| SwiftUI : Sheet & FullScreenCover & Transition & Animation 비교 (0) | 2021.05.11 |
|---|---|
| SwiftUI : 애니메이션과 비슷한 Transitions (0) | 2021.05.10 |
| SwiftUI : Identifiable을 사용하여 연락처 뷰 (0) | 2021.05.03 |
| SwiftUI : ScrollToTop 맨위로 버튼 (1) | 2021.04.28 |
| SwiftUI : DarkMode 구현하기 - Environment (2) | 2021.04.14 |


 한국어 (기본)
 English
 Русский
 日本語
日本語
