WebKit에 대해 알아보도록 합시다.
WebView 화면구성
WebView를 구성하기 전에 설정해줘야 하는것이 있습니다.
사전 설정
1. Xcode에 Info.plist로 들어가서 목록 제일 아래를 클릭후 엔터↩를 눌러주세요
2. App Transport Security Settings을 추가한 후, 그안에 Allow Arbitrary Loads를 추가해주세요.
3. Allow Arbitrary Loads값을 YES 로 바꿔주면 인터넷을 사용 할 수 있습니다.

코드 작성
이제, SwiftUI View를 'WebView'로 따로 만들어 놓겠습니다. 그리고 아래 코드를 넣어주세요.
import SwiftUI
import WebKit

struct MyWebView: UIViewRepresentable {


    var urlToLoad: String

    //ui view 만들기
    func makeUIView(context: Context) -> WKWebView {

        //unwrapping
        guard let url = URL(string: self.urlToLoad) else {
            return WKWebView()
        }
        //웹뷰 인스턴스 생성
        let webView = WKWebView()

        //웹뷰를 로드한다
        webView.load(URLRequest(url: url))
        return webView
    }

    //업데이트 ui view
    func updateUIView(_ uiView: WKWebView, context: UIViewRepresentableContext<MyWebView>) {

    }
}

//Canvas 미리보기용
struct MyWebView_Previews: PreviewProvider {
    static var previews: some View {
        MyWebView(urlToLoad: "https://www.naver.com")
    }
}
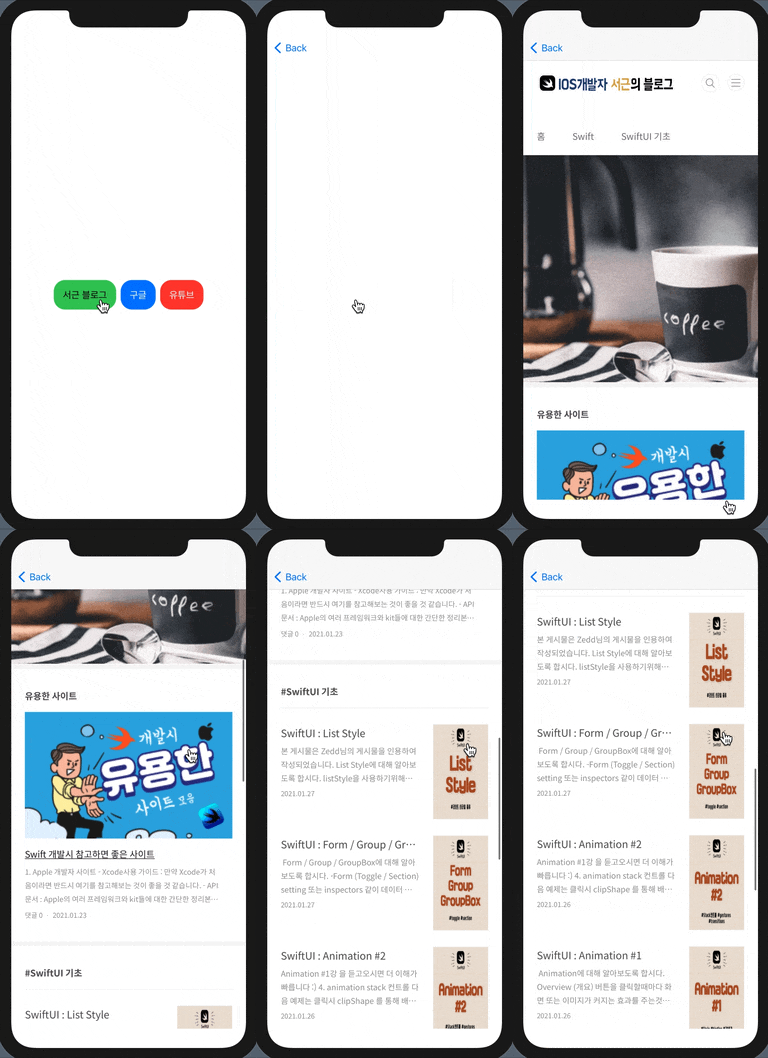
그 후에, ContentView로 돌아와서 body 밑에 다음 코드를 입력해주세요.
        NavigationView {
            HStack{
                NavigationLink(destination: MyWebView(urlToLoad: "https://seons-dev.tistory.com/")) {
                    Text("서근 블로그")
                        .edgesIgnoringSafeArea(.all)
                        .padding()
                        .background(Color.green)
                        .foregroundColor(.black)
                        .cornerRadius(20, antialiased: true)
                }
                NavigationLink(destination: MyWebView(urlToLoad: "https://www.google.com")) {
                    Text("구글")
                        .edgesIgnoringSafeArea(.all)
                        .padding()
                        .background(Color.blue)
                        .foregroundColor(.white)
                        .cornerRadius(20, antialiased: true)
                }
                NavigationLink(destination: MyWebView(urlToLoad: "https://www.youtube.com")) {
                    Text("유튜브")
                        .edgesIgnoringSafeArea(.all)
                        .padding()
                        .background(Color.red)
                        .foregroundColor(.white)
                        .cornerRadius(20, antialiased: true)
                }
            }
        }
읽어주셔서 감사합니다🤟
본 게시글의 전체코드 GitHub
Seogun95/SwiftUI_WebView
SwiftUI에서 WebView를 사용해보겠습니다. Contribute to Seogun95/SwiftUI_WebView development by creating an account on GitHub.
github.com
'SWIFTUI > WebView' 카테고리의 다른 글
| SwiftUI : Map View (0) | 2021.03.08 |
|---|---|
| SwiftUI : VideoPlayer (2) | 2021.01.31 |
| SwiftUI : Link (0) | 2021.01.30 |


 한국어 (기본)
 English
 Русский
 日本語
日本語
