

 SEOGUN
반응형
https://github.com/appbrewery/Destini-LayoutPractice-iOS13
GitHub - appbrewery/Destini-LayoutPractice-iOS13: Learn to Code While Building Apps - The Complete iOS Development Bootcamp
Learn to Code While Building Apps - The Complete iOS Development Bootcamp - GitHub - appbrewery/Destini-LayoutPractice-iOS13: Learn to Code While Building Apps - The Complete iOS Development Bootcamp
github.com
MVC 디자인 패턴을 사용하여 섹션9 에서 만든 퀴즈앱과 유사한 앱을 만들어 볼까한다.
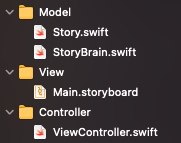
MainStoryBoard
mainStoryBoard에서 autoLayout을 사용하여 label을 구성함.

MVC
model, view, controller 폴더를 만들어 MVC 패턴과 맞게 swift 파일 생성
model
// Story.swift

struct Story {

    let title: String
    let choice1: String
    let choice2: String

    let choice1Destination: Int
    let choice2Destination: Int
}
// StoryBrain
import Foundation
import UIKit
struct StoryBrain {
var numberOfStories = 0
let stories = [
Story(title: "원하는 길을 선택하세요", choice1: "왼쪽", choice2: "오른쪽", choice1Destination: 1, choice2Destination: 2),
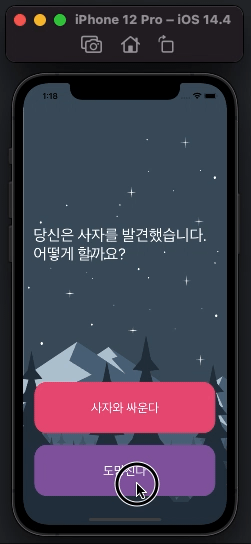
Story(title: "당신은 사자를 발견했습니다. 어떻게 할까요?", choice1: "사자와 싸운다", choice2: "도망친다", choice1Destination: 0, choice2Destination: 0),
Story(title: "보물을 발견했습니다!", choice1: "열어본다", choice2: "숨긴다", choice1Destination: 0, choice2Destination: 0)
]
func getStoryTitle() -> String {
return stories[numberOfStories].title
}
func getChoice1() -> String {
return stories[numberOfStories].choice1
}
func getChoice2() -> String {
return stories[numberOfStories].choice2
}
mutating func nextStory(userChoice: String) {
let correctChoice = stories[numberOfStories]
if userChoice == correctChoice.choice1 {
numberOfStories = correctChoice.choice1Destination
} else if userChoice == correctChoice.choice2 {
numberOfStories = correctChoice.choice2Destination
}
}
}Controller
// viewController.swift


import UIKit

class ViewController: UIViewController {

    @IBOutlet weak var storyTitle: UILabel!
    @IBOutlet weak var choice1: UIButton!
    @IBOutlet weak var choice2: UIButton!

    var storyBrian = StoryBrain()


    override func viewDidLoad() {
        super.viewDidLoad()
        updateUI()
    }

    @IBAction func choiceBtn(_ sender: UIButton) {

        storyBrian.nextStory(userChoice: sender.currentTitle!)

        updateUI()
    }


    func updateUI() {
        storyTitle.text = storyBrian.getStoryTitle()
        choice1.setTitle(storyBrian.getChoice1(), for: .normal)
        choice2.setTitle(storyBrian.getChoice2(), for: .normal)
    }
}
'SWIFT > Udemy iOS' 카테고리의 다른 글
| [Udemy] 섹션12: stepper, textField, segue 더치페이 계산기 (0) | 2021.08.12 |
|---|---|
| [Udemy] 섹션11: Segue, Cocoa Touch Class, Optional Binding, BMI계산기 (0) | 2021.08.09 |
| [Udemy] 섹션9: MVC 패턴, Struct, mutating ( 퀴즈 앱 ) (0) | 2021.08.02 |
| [Udemy] 섹션8: Egg Timer / ProgressView ( Control Flow and Optionals ) (0) | 2021.07.31 |
| [Udemy] 섹션7: Play Sound 및 Bundle - 실로폰 만들기 (0) | 2021.07.30 |


 한국어 (기본)
 English
 Русский
 日本語
日本語
